Teresa’s Progress

July 11th, 2010

Subscribe

Hi! This is Darren. I’ll be updating you on Teresa’s progress as she travels by kayak from the town of Peace River to Fort Vermilion on the mighty Peace River.

She started her solo kayak expedition on Thursday morning at 11:11 MDT from the beautiful River Front Park in the town of Peace River. We managed to get all of her gear and supplies for the next 9 days into the 17′ Prijon Kodiak. So far, the weather has been warm and sunny.

Since Teresa has the SPOT GPS device with her, we can know that she’s safe and the progress that she’s making, including where she’s been camping every night. Feel free to explore the following map of where she is. Be sure to try the Satellite view and the Topo view on the map.


[Clickable map of Teresa's progress]

On Thursday, I start my big river journey — downstream on the Peace River from the town of Peace River (which used to be called Peace River Crossing, which I feel like calling it so I don’t have to always say “town of” to avoid confusion) all the way to Fort Vermilion. This is the package that we offer, either in an 8-day or 10-day version. I’m giving myself 9 days, which means I have to cover 48 km per day. I am pretty excited — most of my food is packed, clothes are all in a pile, and gear is coming together too. Tomorrow we drive to the Crossing, and then Thursday I shove off! 🙂

Darren, who is not coming with me, will be updating this blog so you can all track where I am. I’ll be using the SPOT device, of course, so you’ll know I’m okay! If you would like to receive every update, please let Darren know and he can add you to the SPOT list.

On another note, I just found a friend’s photos on Panoramio, and he has some nice aerial photos of the Vermilion Chutes! They don’t look too scary from the air, but don’t EVER try to shoot them in a boat. I’ve heard there might be spots at certain water levels that allow them to be passed safely, but I would never take that chance! I feel much better telling you NOT to try. Your canoe may survive the trip, but if you are thrown out, the circulation under the falls can drown you. So, you must follow the south shore and keep a keen eye out for the portage trail. If you’re interested in paddling this section of the Peace, give us a call and we’ll chat about it and see if we can help in any way. 🙂 (Keep reading after the photo.)

What a great photo! And if any of you worried… these rapids and chutes are about 80 km downstream from Fort Vermilion and I won’t be going that far! I’ll stop at Fort after 433 km — that’s far enough, I think! 🙂 I will get picked up early if I am running late, because…

On Saturday, July 17th, we are hosting our first canoe races at Hutch Lake!

Come to Hutch Lake (30 km north of High Level) between 11 am and noon to register in either men’s doubles, women’s doubles, or mixed team. It costs $80 to race (per boat) and 100% of the fees go to the winners (50% to first place, 30% to second place and 30% to third place). You can register in 2 races if you like (one mixed, the other not). We are working with the Hutch Lake cottagers to put this event on, and it’s bound to be a lot of fun!

If you’re interested in racing but need a boat, we will be there renting boats for this day — call us to book it ahead of time! It will cost $20/race. Have a look at our canoes page to see which one you’re interested in.

Have you ever dreamed of going on an expedition? Do stories of men who ski to the north pole or climb Mount Everest catch your imagination? Stories of explorers and far away lands have always sparked something within us!

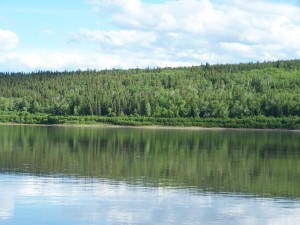
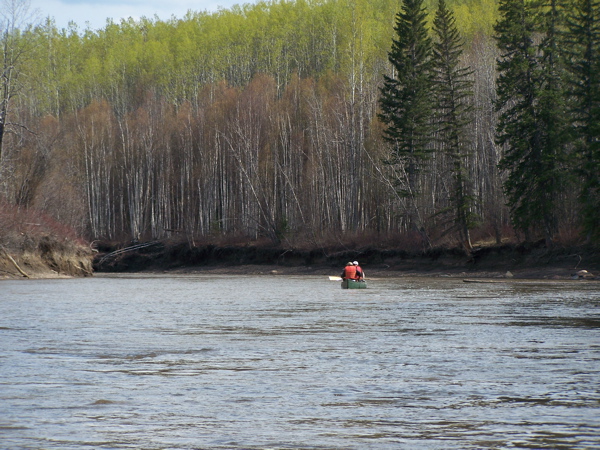
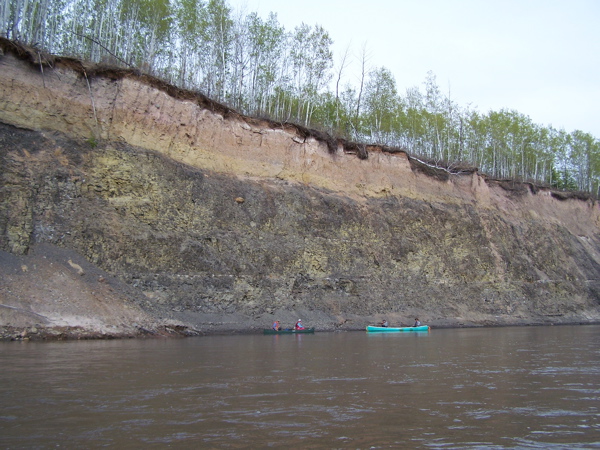
Calm water on the Peace River

Have you ever thought of retracing Sir Alexander Mackenzie’s historic voyageur route? In 1789, he led a group of voyageurs and natives to look for a river leading to the Pacific; instead, they followed a massive river flowing north to the arctic ocean, later named the Mackenzie River after him.

I really cannot imagine paddling down a river, truly not knowing where it leads. When I am on the water, I often refer to my maps to see what islands or river confluences are coming up, and I certainly know where I’ll end up in 2-3 days’ time. Not so with the early explorers; when Mackenzie left the Great Slave Lake, he only knew the river they were on flowed west, for the time being. When it curved North and didn’t resume its westerly flow, he realized it wouldn’t lead to the Pacific, but he didn’t know where it would lead. It was only when they noticed tidal fluctuations in the water level near their camp that they knew they were near the Arctic Ocean. After this journey, he returned to England to improve his skills with the navigational instruments of the day, to obtain better latitude and longitude measurements.

In 1792, he tried again, this time following the Peace River upstream to Fort Fork, located near the present-day town of Peace River, to spend the winter. In spring of 1793, he and his crew of 9 made the push upstream again, eventually over the continental divide, downstream and overland to an inlet of the Pacific Ocean.

There’s no question that paddling the Peace River is a chance to retrace history… to follow in the footsteps and paddle-strokes of explorers, fur traders, aboriginal people, entrepreneurs and men of vision. It’s length is epic; it can take a month to paddle the full length, although Mackenzie and his contemporaries paddled it much faster than that. They made their entire return trip in 30 days, from the Pacific to Fort Chipewyan, which included 450 km (280 miles) of hiking. Once they reached the end of that very long portage, they covered 1380 km (860 miles) of water in 24 days — an average of 58 km/day (36 miles/day), including portages!

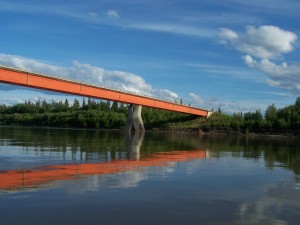
We offer two packages with much more relaxed pace — 8-day and 10-day paddling packages for one 430-km section (267 miles), from the town of Peace River to one of Alberta’s first communities, Fort Vermilion. Check this page for details on this unguided trip. (Photo at left is the highway bridge near Fort Vermilion.)

If you are interested in paddling this historic waterway, with or without our paddling package, we’d be happy to help in any way, either by supplying equipment, sharing local knowledge, or by picking you up at the end. When you’re on the water, it’s very reassuring to know that someone will be waving on the shore when you reach your destination!

Happy Canada Day!

Danger of Heatstroke

June 29th, 2010

Subscribe

In hot weather, especially with high humidity, you can lose a great deal of body fluid through exercise. This can lead to a variety of heat-related illnesses, including heat exhaustion and heatstroke. Heat challenge is a combination of a number of external heat factors. Balanced against this heat challenge is your body’s methods of heat loss (passive and active). When the heat challenge is greater than heat loss (positive factors), you are at risk for a heat-related injury. In order to reduce the risk, you need to either decrease the heat challenge or increase your heat loss. Maintaining proper fluid balance is a central part of exercising in a heat challenge.

Heat Challenge—Negative Factors
* Temperature
* Exercise
* Humidity (see Heat Index below)
* Body wetness from sweating, rain, or water
* Wind (see Windchill Index)

Passive Heat Loss—Positive Factors
* Body size/shape—your surface-to-volume ratio affects how quickly you lose heat
* Insulation—type of clothing affects how you lose heat
* Body fat—amount of body fat affects how quickly you lose heat
* Shell/Core Response—allows the body shell to act as a thermal barrier

Active Heat Loss—Positive Factors
* Radiant heat from the body
* Sweating—ability to sweat is limited by fluid levels and level of fitness
* Wind (see Windchill Index)

The Heat Index

Ambient temperature is not the only factor in creating the potential for heat injuries; humidity is also important. Since our bodies rely on the evaporation of sweat as a major method of cooling, high humidity reduces our ability to evaporate sweat and cool the body, increasing the risk of heat illnesses. The Heat Index shows the relative effects of temperature and humidity.

Heat Index

Environmental
Temperature F° (C°)

70°

(21)

75°
(24)
80°
(27)
85°

(29)

90°
(32)
95°
(35)
100°

(38)

105°
(41)
110°
(43)
115°

(46)

120°
(49)
 Relative
 Humidity

Apparent
Temperature F° (C°)

 0% 64°
(18)
69°

(20)

73°
(23)
78°
(26)
83°

(28)

87°
(31)
91°
(33)
95°

(35)

99°
(37)
103°
(39)
107°

(42)

 10% 65°
(18)
70°

(21)

75°
(24)
80°
(27)
85°

(29)

90°
(33)
95°
(35)
100°

(38)

105°
(41)
111°
(44)
116°

(47)

 20% 66°
(19)
72°

(22)

77°
(25)
82°
(28)
87°

(30)

93°
(33)
99°
(37)
105°

(41)

112°
(44)
120°
(49)
130°

(54)

 30% 67°
(19)
73°

(23)

78°
(26)
84°
(29)
90°

(33)

96°
(36)
104°
(40)
113°

(45)

123°
(51)
135°
(57)
148°

(64)

 40% 68°
(20)
74°

(23)

79°
(26)
86°
(30)
93°

(34)

101°
(38)
110°
(43)
123°

(56)

137°
(58)
151°
(66)
 50% 69°
(20)
75°
(24)
81°
(27)
88°
(31)
96°
(36)
107°
(42)
120°
(49)
135°
(57)
150°
(66)
 60% 70°
(21)
76°
(24)
82°
(28)
90°
(33)
100°
(38)
114°
(46)
132°
(56)
149°
(65)
 70% 70°
(21)
77°
(25)
85°
(29)
93°
(34)
106°
(41)
124°
(51)
144°
(62)
 80% 71°
(22)
78°

(26)

86°
(30)
97°
(36)
113°

(45)

136°
(58)
 90% 71°
(22)
79°

(26)

88°
(31)
102°
(39)
122°

(50)

 100% 72°
(22)
80°
(27)
91°
(33)
108°
(42)
Apparent temperature Heat-stress risk with physical
activity and/or prolonged exposure.
 90°–104°
(32–40)
Heat cramps or
heat exhaustion possible
 105°–129°
(31–54)
Heat cramps or
heat exhaustion likely.
Heatstroke possible.
130° and up (54 and up) Heatstroke very
likely.

Caution: This chart provides guidelines for assessing the potential severity of heat stress. Individual reactions to heat will vary. Heat illnesses can occur at lower temperature than indicated on this chart. Exposure to full sunshine can increase values up to 15° F.

Heat illnesses are the result of elevated body temperatures due to an inability to dissipate the body’s heat and/or a decreased fluid level. Always remember that mild heat illnesses have the potential of becoming life-threatening emergencies if not treated properly.

Heat Cramps

Heat cramps are a form of muscle cramp brought on by exertion and insufficient salt.

Treatment

Replace salt and fluid and stretch the muscle. Kneading and pounding the muscle is less effective than stretching and probably contributes to residual soreness.

Heat Syncope

Heat syncope (fainting) is a mild form of heat illness that results from physical exertion in a hot environment. In an effort to increase heat loss, the blood vessels in the skin dilate to such an extent that blood flow to the brain is reduced, resulting in symptoms of faintness, dizziness, headache, increased pulse rate, restlessness, nausea, vomiting, and possibly even a brief loss of consciousness. Inadequate fluid replacement that leads to dehydration contributes significantly to this problem.

Treatment

Heat syncope should be treated as fainting. The person should lie or sit down, preferably in the shade or in a cool environment. Elevate the feet and give fluids, particularly those containing salt (commercial rehydration mix or 1/2 teaspoon salt and 1/2 teaspoon baking soda per quart or liter). The patient should not engage in vigorous activity at least for the rest of that day. Only after she has completely restored her body fluids and salt and has a normal urinary output should exercise in a hot environment be resumed, and then cautiously.

Heat Exhaustion

This occurs when fluid losses from sweating and respiration are greater than internal fluid reserves (volume depletion). Heat exhaustion is really a form of volume shock. The lack of fluid causes the body to constrict blood vessels, especially in the arms and legs. To understand heat exhaustion, think of a car with a radiator leak pulling a trailer up a mountain pass. There is not enough fluid in the system to cool off the engine, so the car overheats. Adding fluid solves the problem. The signs and symptoms of heat exhaustion are:

* Sweating
* Skin—pale, clammy (from peripheral vasoconstriction)
* Pulse rate increased
* Respiration rate increased
* Temperature normal or slightly elevated
* Urine output decreased
* Patient feels weak, dizzy, thirsty, “sick,” anxious
* Nausea and vomiting (from decreased circulation in the stomach)

Treatment

Victims of heat exhaustion must be properly rehydrated and must be very careful about resuming physical activity (it is best to see a physician before doing so). Treatment is as described for heat syncope, but the person should be more conservative about resuming physical activity to give the body a chance to recover. Have the person rest (lying down) in the shade. Replace fluid with a water-salt solution (commercial rehydration mix or 1/2 teaspoon salt and 1/2 teaspoon baking soda per quart or liter). Drink slowly; drinking too much, too fast very often causes nausea and vomiting.

Evacuation is not usually necessary. Heat exhaustion can become heatstroke if not properly treated. A victim of heat exhaustion should be closely monitored to make sure that her temperature does not go above 103° F (39° C). If it does, treat the person for heatstroke.

Heatstroke

Heatstroke is an immediate life-threatening medical emergency. A victim can die within minutes if not properly treated. Heatstroke is caused by an increase in the body’s core temperature. Core temperatures over 105° F (41° C) can lead to death. The rate of onset of heatstroke depends on the individual’s fluid status. To understand heatstroke, think of that same car pulling a trailer up a mountain pass on a hot day. This time the radiator has plenty of fluid, but the heat challenge of the engine combined with the external temperature is too much. The engine can’t get rid of the heat fast enough and the engine overheats.

There are two types of heatstroke—fluid depleted (slow onset) and fluid intact (fast onset).

* Fluid depleted: The person has heat exhaustion due to fluid loss from sweating and/or inadequate fluid replacement, but continues to function in a heat challenge situation. Ultimately, the lack of fluid minimizes the body’s active heat-loss capabilities to such an extent that the internal core temperature begins to rise. Example: a cyclist on a hot day with limited water.
* Fluid intact: The person is under an extreme heat challenge. The heat challenge overwhelms the body’s active heat-loss mechanisms even though the fluid level is sufficient. This typically has a very fast onset. Example: a cyclist pushing hard on a 104° F day (40° C).

Signs and Symptoms of Heatstroke

The key to identifying heatstroke is hot skin. Some victims may have hot dry skin; others may have hot wet skin because they have just moved from heat exhaustion to heatstroke. Also look for:

* Pale skin (Peripheral vasoconstriction)
* Increased pulse rate
* Increased respiratory rate
* Decreased urine output
* Increased temperature (may be over 105° F/41° C)—skin hot to the touch
* Skin that is wet or dry and flushed
* Severe changes in mental status and motor/sensory changes; the person may become comatose; possibility of seizures
* Pupils that are dilated and unresponsive to light

Treatment

Efforts to reduce body temperature must begin immediately! Move the patient (gently) to a cooler spot or shade the victim. Remove clothing. Pour water on the extremities and fan the person to increase air circulation and evaporation, or cover the extremities with cool wet cloths and fan the patient. Immersion in cool (not cold) water is also useful. Cooling extremities should be massaged vigorously to help propel the cooled blood back into the core.

After the temperature has been reduced to 102° F (39° C), active cooling should be reduced to avoid hypothermia (if shivering begins, it produces more heat). The patient must be monitored closely to make sure her temperature does not increase again. She will probably need fluids regardless of the type of onset. Apply basic life support (CPR) if needed. Afterward, there can be serious medical problems. Prepare to evacuate your patient.

From Teresa: I don’t normally copy web content, but this is so well-written and as I am not an expert in the medical field, I chose to do so for this article. Many thanks again to the Princeton Outdoor Action which took material from The Backpacker’s Field Manual.

Danger of Hypothermia

June 25th, 2010

Subscribe

Hypothermia is a danger whenever the temperature drops or you get wet and can’t dry out. It’s important to know the basics of hypothermia, how to identify it, and how to treat mild cases. Hypothermia is when your core body temperature drops and your body functions are hindered, which can eventually lead to death.

There are 4 ways we lose heat:

1. Radiation – loss of heat to the environment due to the temperature gradient (difference). This occurs whenever the ambient temperature is below 98.6 F or 37 C. Factors important in radiant heat loss are the surface area and the temperature difference.

2. Conduction – through direct contact between objects
Water conducts heat away from the body 25 times faster than air because it has a greater density (therefore a greater heat capacity). Stay dry = stay alive!
Example: Generally conductive heat loss accounts for only about 2% of overall loss. However, with wet clothes the loss is increased 5 times.

3. Convection is a process of conduction where one of the objects is in motion. Molecules against the surface are heated, move away, and are replaced by new molecules which are also heated. The rate of convective heat loss depends on the density of the moving substance (water convection occurs more quickly than air convection) and the velocity of the moving substance. Wind Chill is an example of the effects of air convection.

4. Evaporation – heat loss from converting water from a liquid to a gas
– Perspiration – evaporation of water to remove excess heat
– Sweating – body response to remove excess heat
– Respiration – heat lost in water vapour that is exhaled
It is important to recognize the strong connection between fluid levels, fluid loss, and heat loss. As body moisture is lost through the various evaporative processes the overall circulating volume is reduced which can lead to dehydration. This decrease in fluid level makes the body more susceptible to hypothermia and other cold injuries.

Conditions Leading to Hypothermia

– Cold temperatures
– Improper clothing and equipment
– Wetness
– Fatigue, exhaustion
– Dehydration
– Poor food intake
– No knowledge of hypothermia
– Alcohol intake – causes vasodilation leading to increased heat loss

Signs and Symptoms of Hypothermia

a. Watch for the “-Umbles” – stumbles, mumbles, fumbles, and grumbles which show changes in motor coordination and levels of consciousness.

b. Mild Hypothermia – core temperature 98.6 – 96 degrees F (37 – 35.5 C)
– Shivering – not under voluntary control
– Can’t do complex motor functions (ice climbing or skiing) but can still walk & talk
– Vasoconstriction to periphery

c. Moderate Hypothermia – core temperature 95 – 93 degrees F (35 – 34 C)
– Dazed consciousness
– Loss of fine motor coordination – particularly in hands – can’t zip up parka, due to restricted peripheral blood flow
– Slurred speech
– Violent shivering
– Irrational behavior – Paradoxical Undressing – person starts to take off clothing, unaware s/he is cold
– “I don’t care attitude” – flattened affect

d. Severe Hypothermia – core temperature 92 – 86 degrees F (33 – 30 C) and below (immediately life threatening)
– Shivering occurs in waves, violent then pause, pauses get longer until shivering finally ceases – because the heat output from burning glycogen in the muscles is not sufficient to counteract the continually dropping core temperature, the body shuts down on shivering to conserve glucose.
– Person falls to the ground, can’t walk, curls up into a fetal position to conserve heat
– Muscle rigidity develops – because peripheral blood flow is reduced and due to lactic acid and CO2 buildup in the muscles
– Skin is pale
– Pupils dilate
– Pulse rate decreases
– At 90 degrees F (32 C) the body tries to move into hibernation, shutting down all peripheral blood flow and reducing breathing rate and heart rate.
– At 86 degrees F (30 C) the body is in a state of “metabolic icebox.” The person looks dead but is still alive.

e. Death from Hypothermia
– Breathing becomes erratic and very shallow
– Semi-conscious
– Cardiac arrythmias develop, any sudden shock may set off Ventricular Fibrillation
– Heart stops, death

How to Assess if Someone is Hypothermic

– If shivering can be stopped voluntarily = mild hypothermia
– Ask the person a question that requires higher reasoning in the brain (count backwards from 100 by 9’s). If the person is hypothermic, they won’t be able to do it. [Note: there are also other conditions such as altitude sickness that can also cause the same condition.]
– If shivering cannot be stopped voluntarily = moderate – severe hypothermia
– If you can’t get a radial pulse at the wrist it indicates a core temp below 90 – 86 degrees (32 – 30 C)
– The person may be curled up in a fetal position. Try to open their arm up from the fetal position, if it curls back up, the person is alive. Dead muscles won’t contract only live muscles.

Treating Mild or Moderate Hypothermia

1. Reduce Heat Loss
– Additional layers of clothing
– Dry clothing
– Increased physical activity
– Shelter

2. Add Fuel & Fluids
It is essential to keep a hypothermic person adequately hydrated and fueled.

a. Food types
– Carbohydrates – 5 calories/gram – quickly released into blood stream for sudden brief heat surge – these are the best to use for quick energy intake especially for mild cases of hypothermia.
– Proteins – 5 calories/gram – slowly released – heat given off over a longer period.
– Fats – 9 calories/gram – slowly released but are good because they release heat over a long period, however, it takes more energy to break fats down into glucose – also takes more water to break down fats leading to increased fluid loss.

b. Food intake
– Hot liquids – calories plus heat source
– Sugars (kindling)
– GORP – has both carbohydrates (sticks) and proteins/fats (logs)

c. Things to avoid
– Alcohol – a vasodilator – increases peripheral heat loss
– Caffeine – a diuretic – causes water loss increasing dehydration
– Tobacco/nicotine – a vasoconstrictor, increases risk of frostbite

3. Add Heat
– Fire or other external heat source
– Body to body contact. Get into a sleeping bag, in dry clothing with a normo-thermic person in lightweight dry clothing

Severe Hypothermia

For severe hypothermia, you will need medical attention — use the 9-1-1 button on the SPOT device. In the mean time, you can follow these steps:

1. Reduce Heat Loss
Hypothermia Wrap:
The idea is to provide a shell of total insulation for the patient. No matter how cold, patients can still internally rewarm themselves much more efficiently than any external rewarming. Make sure the patient is dry, and has a polypropylene layer to minimize sweating on the skin. The person must be protected from any moisture in the environment. Use multiple sleeping bags, wool blankets, wool clothing, Ensolite pads to create a minimum of 4″ of insulation all the way around the patient, especially between the patient and the ground. Include an aluminum “space” blanket to help prevent radiant heat loss, and wrap the entire ensemble in plastic to protect from wind and water. If someone is truly hypothermic, don’t put him/her naked in a sleeping bag with another person.

2. Add Fuel & Fluids
Warm Sugar Water.
For people in severe hypothermia, the stomach has shut down and will not digest solid food but can absorb water and sugars. Give a dilute mixture of warm water with sugar every 15 minutes. Dilute Jelloâ„¢ works best since it is part sugar and part protein. This will be absorbed directly into the blood stream providing the necessary calories to allow the person to rewarm themselves. One box of Jello = 500 Kilocalories of heat energy. Do not give full strength Jello even in liquid form, it is too concentrated and will not be absorbed.
Urination. People will have to urinate from cold diuresis. Vasoconstriction creates greater volume pressure in the blood stream. The kidneys pull off excess fluid to reduce the pressure. A full bladder results in body heat being used to keep urine warm rather than vital organs. Once the person has urinated, it precious body heat will be used to maintain the temperature of vital organs. So in the end urinating will help conserve heat. You will need to help the person urinate. Open up the Hypothermia Wrap enough to do this and then cover them back up. You will need to keep them hydrated with the dilute Jello solution described above.

3. Add Heat
Heat
can be applied to transfer heat to major arteries – at the neck for the carotid, at the armpits for the brachial, at the groin for the femoral, at the palms of the hands for the arterial arch.
– Chemical heat packs such as the Heat Waveâ„¢ provides 110 degrees F (43 C) for 6-10 hours.
– Hot water bottles, warm rocks, towels, compresses
– For a severely hypothermic person, rescue breathing can increase oxygen and provide internal heat.

Majority of the info for this post comes from here.

Paddle the Peace!

June 22nd, 2010

Subscribe

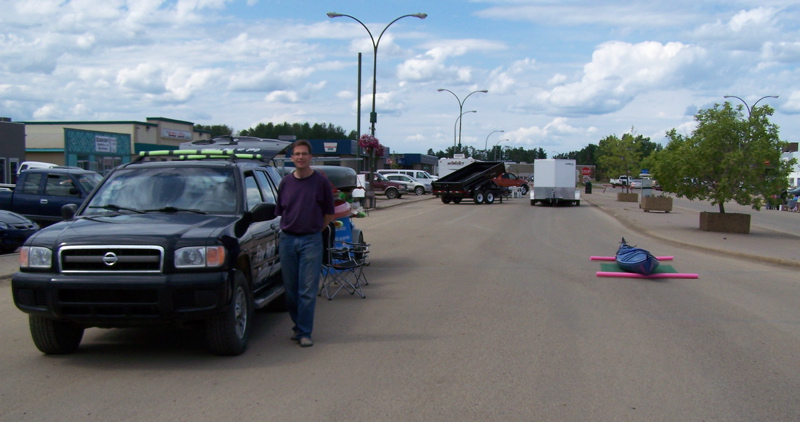
We had a very busy weekend! On Friday, we spent most of the day in downtown High Level at Sale-a-brate the Sun! It was an outdoor sidewalk sale and sort of trade show.

Then on Sunday, we participated in the Paddle the Peace event. It was a collaborative effort between several municipalities — the County of Northern Lights, Northern Sunrise County, Lac Cardinal County, City of Peace River, Smoky River Regional Economic Development — GeoTourism Canada and us. We paddled from Strong Creek Park (about 13 km south on Shaftesbury Trail) to the DMI bridge where Hwy 986 crosses the river (about 18 km downstream from the Riverfront Park). It was a great day, beautiful weather, and we had great turnout for our first year! Over 100 people! Next year, it will probably double as word of mouth spreads how much fun we had! What a great way to spend Father’s Day.

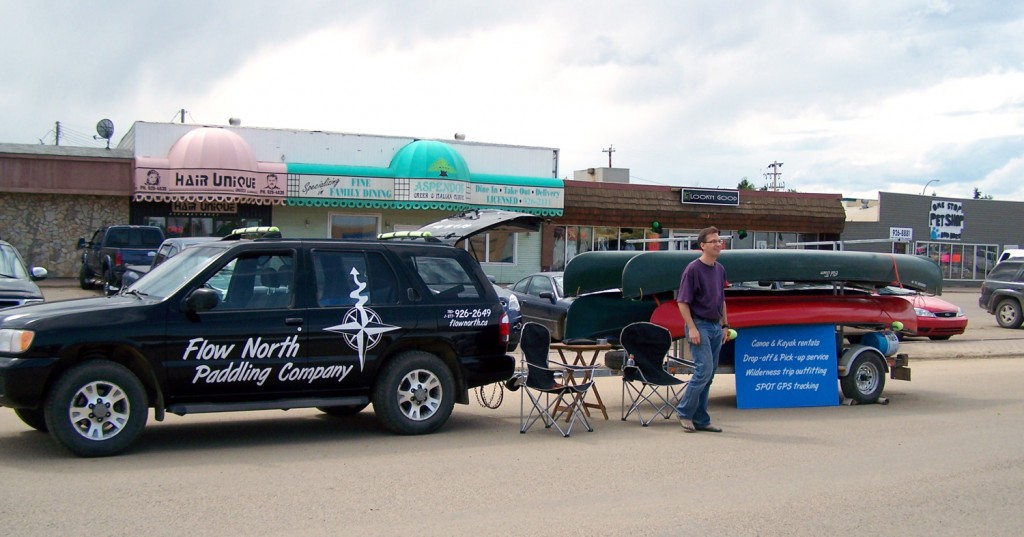
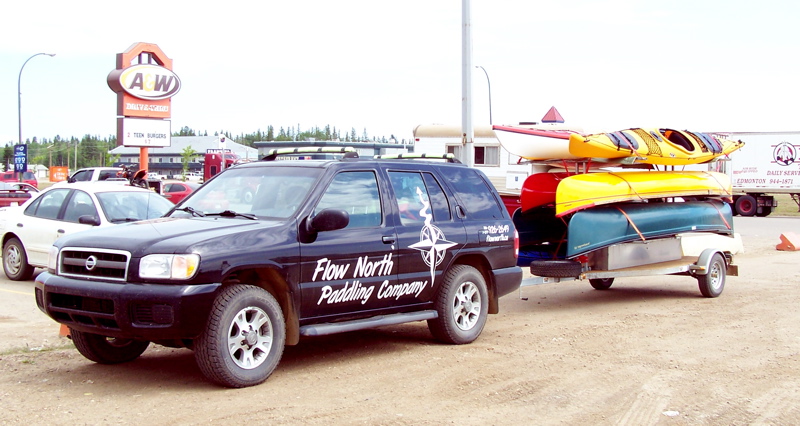
We took all our boats, except one, a whitewater canoe, down for the event. This pic is us all loaded up in High Level, ready to leave. More pics to follow — we were so busy with the day, we didn’t get any pictures! But lots of other people did, so I’ll add some later on.

By the way, don’t you love the artwork on our vehicle!?! Keep an eye out for us as we drive around Northern Alberta!

Try a Kayak Day

June 4th, 2010

Subscribe

The much-anticipated Try a Kayak Day is this Saturday, June 5th! We’ll be at Footner Lake, located just beside the airport, about 10 km north of High Level on Hwy 35. Come by from noon to 5 pm (if it’s nice, we’ll probably stay until 6pm) and have a chance to learn a bit about kayaks and go for a little paddle on the lake.

The forecast looks a little sketchy, but we are sure that in the end, it will be nice — not raining — in the afternoon. If the weather is terrible, we’ll cancel it, and we’ll post a blog entry here so you know. If the weather is iffy, come out anyway, and we’ll be there. If it’s too cold, no worries, we’ll have another Try a Kayak Day in July. June just seems a little too crazy for people.

We have 3 single kayaks and one double kayak that you’ll have a chance to oogle and then try:
– Current Designs Vision 135 Roto (single) more info | reviews (Vision 140)
– Current Designs Breeze (single) more info | reviews
– Prijon Kodiak (single) more info | reviews
– Current Designs Unity (double) more info | reviews

People often think that kayaks are more tippy and scarier than canoes. Not true! Once you get the hang of it, kayaking is wonderfully freeing… you’re in charge of your own boat, you can maneuver really well, and go wherever you want — into very shallow water and tight little spots. Some people are afraid that if they tip, they will be stuck inside and drown. Also not true! If you should tip, it’s very easy to push the kayak away and just pop out of the cockpit and come to the surface. Some people compare it to doing a somersault. Now you might not have done a somersault since you were a kid, but in the water it’s easy and it all comes back to you! If you have a spraydeck/sprayskirt on, you have to take that off first, but it’s also quite easy. At Try a Kayak Day, you won’t be wearing skirts, just to keep it simple.

Hope to see you there!

Full Moon Paddling

May 23rd, 2010

Subscribe

This Thursday is the first Full Moon Paddling night! And the forecast looks good! Make sure to call this week to book your spot as spaces are limited. The plan is to meet at the beach at Hutch Lake around 10 pm, paddle around for 2-3 hours, and enjoy a warm drink (coffee, tea, hot chocolate) and a campfire after. If it is too windy, Hutch Lake can get quite wavy, so we’ll change the location to Footner Lake. Although Footner is smaller, it is still quite nice to paddle and explore. If the weather is downright yucky, we’ll postpone it for a night and hope for better weather — but I don’t think that’s going to happen. If you can’t make it Friday night, or if we get rained out both nights, we’ll give you a full refund. The cost is $30/person.

So that’s the plan — call us soon while there are still spots available. See you there!

Go to the Full Moon Paddling page.

Fun on the Ponton

May 10th, 2010

Subscribe

We went with some friends to paddle the Ponton River yesterday! It was a perfect day for it, and the water level was perfect too. This isn’t a river we normally promote paddling on, because the water level is often too low to paddle — it is only consistently high enough in spring for a short window, but may also be possible if we’ve had lots of rain.

It’s an interesting river, fairly narrow and winding, and the section we did had some nice little class 1 rapids! Lots of fun, and although we bonked a few boulders, we didn’t have any really scary moments. A few tippy spots, but we stayed on the right side of the water!

Enjoy the photos below! If you want to paddle this river, call us (1-877-926-2649) and we can discuss the water levels and what your options are! The river itself starts from the north part of Margaret Lake, a lake on the top plateau of the Caribou Mountains. It’s not a very nice paddle at the beginning, from what I’ve heard — swampy, full of beaver dams, and then gets steep as it drops down the Caribou Mountain slope — but the lower parts are quite nice.

With spring feeling more and more like it’s here to stay, now’s the time to start planning your paddling trip! If you like the “Choose Your Own Adventure” way of doing things, then you’ve got a bit of work to do! We’ve boiled it down into 6 steps:

Step 1: Figure out how much time you have available. Whether you have only a day or several weeks, there are places you can paddle and experience the wilderness of Northwestern Alberta. Look at your schedule and discuss it with whoever you’re going paddling with, and determine how many days you have altogether.

Step 2: Decide where you’d like to paddle. Always wanted to canoe the historic Peace River? Seeking the remoteness of the Chinchaga? To help you decide, read the Where We Paddle page and the Trip Details page. Call us or email if you have any questions.

Step 3: Consider your travel time. If you’re coming from central or southern Alberta, out-of-province, or from farther away, you’ll need to consider your travel time to get to the water. In general, it takes 8 hours driving from Edmonton to High Level, Flow North’s base (add your pit-stops/break time onto that), or 1.5 hrs flying time. Approximate distances and travel times to some popular paddling put-ins are below.

River/Lake From To Distance (Time)
Peace River Edmonton City of Peace River 490 km (5 hrs)
Edmonton Fort St. John, BC 660 km (7.5 hrs)
Edmonton Hudson’s Hope, BC 760 km (9 hrs)
Edmonton Notikewin Provincial Park 630 km (6.5 hrs)
Edmonton Fort Vermilion 860 km (9.5 hrs)
High Level Tompkin’s Landing 77 km (45 min)
High Level Notikewin Provincial Park 190 km (2 hrs)
High Level City of Peace River 300 km (3 hrs)
High Level Dunvegan 365 km (3.8 hrs)
High Level Clayhurst Bridge 490 km (5 hrs)
High Level Hudson’s Hope, BC 650 km (7 hrs)
Wabasca River Edmonton North Wabasca Lake 390 km (4 hrs)
Edmonton Bridge crossing near Loon River 490 km (5 hrs)
Edmonton Senex Creek Bridge 530km (5.5 hrs)
Edmonton Tall Cree Bridge 580 km (6+ hrs)
High Level Tall Cree Bridge 155 km (1.5 hrs)
High Level Senex Creek Bridge 205 km (2 hrs)
High Level Bridge crossing near Loon River 250 km (2.5 hrs)
High Level Goosegrass (Trout Mtn) Bridge 410 km (4.3 hrs)
High Level North Wabasca Lake 560 km (~6 hrs)
Chinchaga River Edmonton Forestry Trunk Road crossing 613 km +120 km on backroad* (9+ hrs)
Edmonton Keg River area 730 km (7+ hrs)
Edmonton Chin Bridge (Hwy 58) 860 km (9 hrs)
High Level Chin Bridge (Hwy 58) 72 km (45 min)
High Level Keg River area 95 km (1 hr)
Hay River Edmonton Meander River (Reserve) 850 km (9 hrs)
High Level Hay-Zama Lake outlet 125 km (1.5 hrs)
High Level Meander River (Reserve) 70 km (45 min)
Hay/Zama Lake Edmonton Hay/Zama Lake (Habay) 900 km (4 hrs)
High Level Hay-Zama Lake (Habay) 125 km (1.5 hrs)

*The Forestry Truck Road is not a real road. It isn’t necessarily passable.

Step 4: Call us to reserve your boat. You can ask us any questions you might have, and we’ll let you know what types of canoes and kayaks we have available on your dates. Try to call at least 2 weeks before! If you call sooner, you’ll have your pick of the boats. You can also let us know if you’d like to take advantage of any of our other services, such as the drop-off or pick-up services.

Step 5: Plan your supplies. You’ll be backcountry camping, so you’ll need to bring everything you need with you. Don’t forget you have to keep all your garbage. Below is our packing list for overnight trips — if you book a Full-Service trip with us, we’ll pack all this for you (except your clothes and personal items)! [download pdf version]

Comprehensive Trip Packing List

Water Supplies:
– jug filled with good water (at least enough for one day)
– water tablets

Stove:
– burner
– base
– fuel canister(s)
– grate or reflector oven or portable fireplace

Kitchen Supplies:
– pot(s)
– bowls
– cups
– cutlery
– paring knife (or 2)
– small cutting board
– dish rag
– dish towels
– paper towels
– biodegradable soap
– FOOD (make a separate list/menu)

For each kayak/canoe:
– bailer or water pump
– rope
– sponge
– spray skirt (for kayaks)
– spare paddle (for canoes)
– spare paddle in 2 halves (for kayaks)

For each person:
– PFD
– paddle
– paddle leash
– whistle (on PFD)
– water bottle
– pocket knife (in PFD pocket)
– map(s)

Safety and Survival Kit:
– first aid kit
– extra band-aids
– first aid book
– signaling mirror
– matches in waterproof container
– fire starter sticks
– survival rations or protein bars
– extra water purification tablets
– reflective emergency blanket
– packet of salt
– cutting wire (instead of axe)
– multi-tool
– small bug spray bottle

Camping Supplies:
– tent(s) (don’t forget the poles)
– sleeping mats
– sleeping bags
– small folding chairs
– axe
– small saw
– matches
– toilet paper (in waterproof bag)
– bag for garbage
– flashlights (with good batteries)
– bug spray and/or bug hat/jacket
– tarps and/or groundsheet
– spare straps/rope

Additional Equipment/Supplies:
– GPS tracking device
– bear spray or bear bangers
– water-tight bags
– plastic pail (for putting food in tree)
– ammonia spray bottle (to “mark” your territory)
– spare zip lock bags (large)
– repair kit (*see below)

Clothes:
– sun hat
– rain hat (or hood on rain jacket)
– heavy shirt or sweater
– medium-weight long-sleeved shirt
– light long-sleeved shirt
– T-shirt or sleeveless shirt
– underwear
– long underwear
– light pants
– zip-off pants (or shorts)
– fleece pants
– wind/rain pants
– old running shoes, water socks or some other easy-to-dry footwear
– dry shoes/hiking boots
– noeprene socks (if desired)
– 2 pairs warm (woolly) socks
– sport socks (several pairs)
– rain/windproof jacket
– fleece jacket
– bug jacket and/or hat
– sunglasses
– paddling gloves (if possible)

Personal Items:
– sleeping bag
– small pillow (if desired)
– washcloth
– towel (not too big)
– toothbrush and toothpaste
– hair brush
– sunscreen
– shaving supplies (if desired)
– prescription medications
– books, notebook, sketch book, etc. (if desired)
– binoculars/camera (in waterproof container, such as a Pelican case)

You do not need to bring:
– shampoo (you can use the biodegradable soap provided)
– smelly soaps/makeup/perfume/deodorant (they attract bears)
– citronella-based bug spray (there’s some evidence that this attracts bears)
– bottled water (use water purification tablets or filters instead)

*Repair Kit
This list comes from Bill Mason’s book Song of the Paddle. Some items are unnecessary for shorter, less-wilderness trips.
– accessories (various screws, nails, bolts, rivets, and spare flashlight bulb) in a small container
– Five-minute epoxy
– tube of seam sealer
– length of thin copper wire
– seat bolts
– cord or string
– contact cement
– small needle-nosed pliers
– piece of beeswax
– extra matches in waterproof container
– piece of cotton or nylon (for tent repairs)
– piece of soft leather (for repairing shoes, gloves, or packs)
– stitching awl
– whetstone (for sharpening knives or fish hooks)
– axe file (for sharpening an axe)
– needle and thread, safety pins
– duct tape
– swiss army knife (or other multi-tool)
– awl punch

If you are missing something, call us! We have everything and we can rent or lend individual items to you. If you are only going for a day trip, see this packing list. [download pdf version]

Step 6: Pack, pack, pack! Gather all your clothes, personal items, food and supplies and pack it all together. Using watertight bags/dry bags is best for most things, and bear-proof containers for food. If you need to rent some dry bags from us, just pack everything in plastic bags, and we’ll transfer everything into dry bags before you push off. Obviously, fresh food will have to be packed last, and carefully.

That’s all you need to do to prepare for your trip! If this is a little too daunting for you, call to book a trip using our full-service outfitting.

The above info is also available on this page.