When you’re camping, don’t you just love a nice, sweet dessert? I sure do. If you’re ever looking for an alternative to s’mores, try this new, delicious dessert I discovered last summer!
Campfire Pastry — Apple Danish! — Using a Pie Iron
Have you ever used a pie iron to make grilled cheese over the camp fire? There is hardly anything more delicious! (I’m a big fan of grilled cheese sandwiches!) Hmmm, perhaps even more delicious is dessert — how about pastry made in a pie iron!?!
Ingredients:
2 apples
a pinch of sugar or tiny bit of maple syrup
butter, oil or margarine (whatever you prefer)
1 roll of Pillsbury Croissants (8 croissants makes 4 pastries)
Equipment needed:
pie iron
frying pan
spoon
Directions:
Start by chopping two apples into small pieces, similar to the preparation for an apple pie. Put the pieces in a frying pan and add a little water and whatever you like for sweetener. I also had some wonderful juniper berries, so I added them for extra flavour. You could also add cinnamon, or use another fruit. You might not use all the filling, but it’s better to have a little too much. If your apple is really big, one might be enough…
Put the frying pan on your camp fire or camp stove and cook the apples a bit until they are soft.
Meanwhile, get a good campfire going and get your pie iron ready. Warm it up a bit and cover the insides of both halves with butter or oil.
| When the apples are ready, take them off the fire. Open the package of croissants (using a spoon), and carefully unroll it a little and break one triangle off the roll. If you have a clean cutting board, it might come in handy now, but I just used my hands. 🙂 | 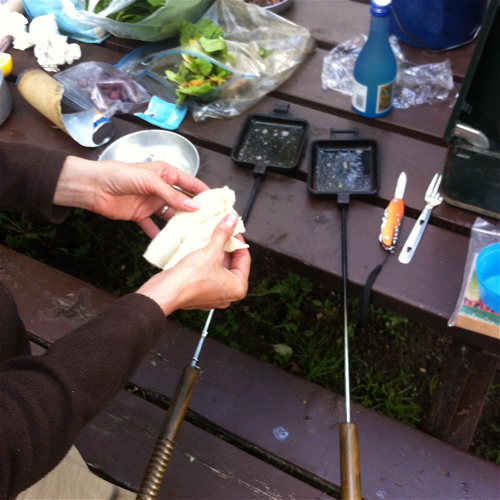 |
| Fold the triangle into a 4-sided shape, somewhat like a kite. | 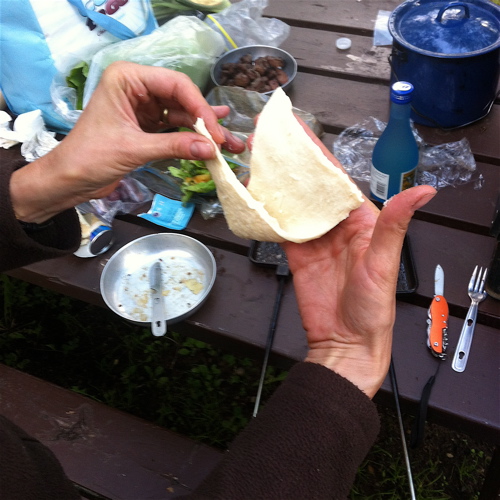  |
| Place it in one side of the pie iron. Repeat the process for the other side of the pie iron. |
 |
| Spoon a little bit of the apple filling on one side. | 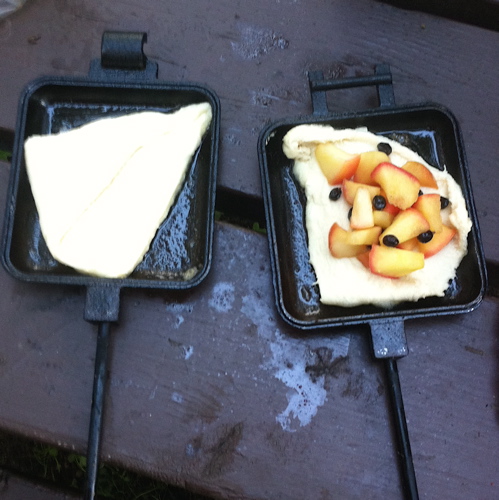 |
| Carefully position the pie iron and close it. If the two halves don’t line up perfectly, don’t worry. The pastry will e-x-p-a-n-d-! | 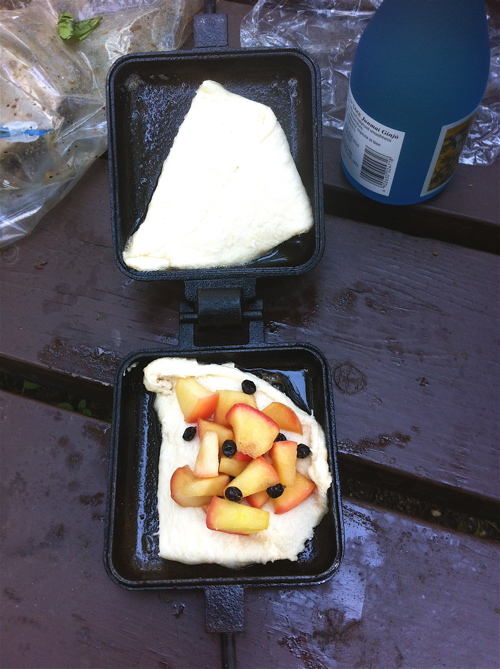 |
| Place the iron on/near your camp fire and turn it over occasionally to cook both sides. Of course, this part is tricky — it’s hard to know when your pastry is done. Our pastries took about 7 minutes, but your fire may be hotter. If there is any doubt, take the pie iron out. It is quick and easy to check, and wouldn’t you rather do that instead of burning your pastry!?!? |  |
When it’s done, pop it out onto a plate and enjoy! Be careful — it will be super-hot at first, so give it a chance to cool. Repeat until you have no more pastry!
Enjoy!